
 www.ConcreteCottage.com
Chronicles of the Design & Construction of Two Waterfront Hurricane Proof Dry Stack Modular Green Custom Homes
1. Villa Lagoon, Wilder Italian Style Home
2. Nasello Italian Style Home
March 2008 Concrete Acid Stain on the Cornice
Monday, March 24, 2025
 |
|
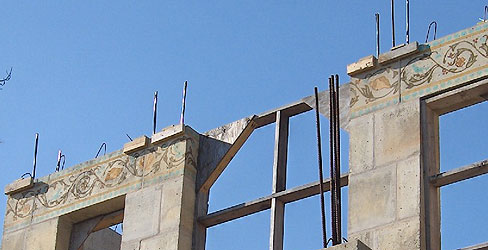
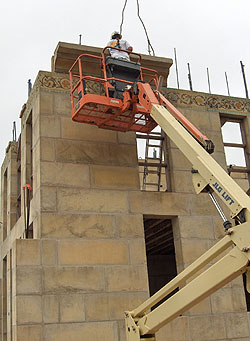
Don is up in the air as Mike in the crane sets the acid stain frieze south side blocks. There is a gap where the door goes since it is higher than the windows and gets a little thin piece of DAC-ART between the top for the door and the cornice. |
|
 |
 |
 |
|
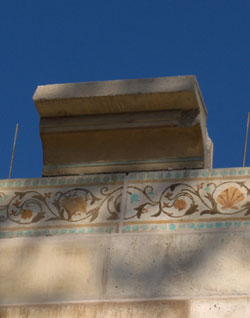
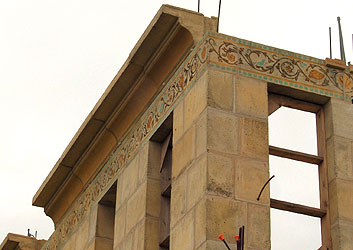
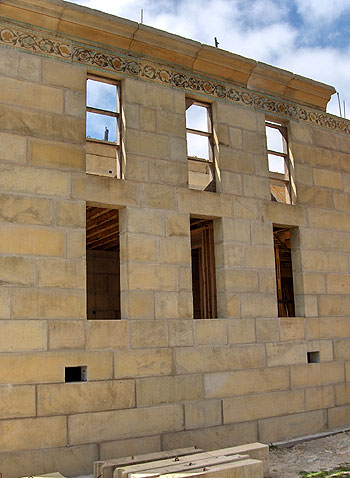
The concrete acid stained frieze is in place on the lower ceiling part of the house and it looks good. It also looks smaller than it did on the ground. Looking up at it from below, everyone agreed that it might look best for me to add some acid stain color to the cornice that sits on top of the frieze row of blocks. |
|
Since we changed the size of the windows in the master bedroom, Joey Pardue of Swifts Supply and Weathershield came out last week to have a look and talk to Dan Z. and make sure we are making the best decisions on size. We want to avoid requesting custom size windows when there is a close match in a standard size. Note: We had to switch off to Hurd Windows as Weathershield could not supply the windows that we originally ordered. See later on what fine windows we got from Hurd. |
 |
 |
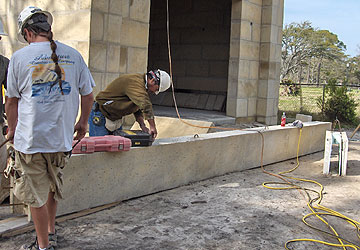 |
We have a gigantically long DAC-ART lintel on the ground. It is going to go across the house where the lower roofed section meets the taller part that contains the master bedroom. Mike says he will set it tomorrow--Tues, March 25th, 2008. |
|
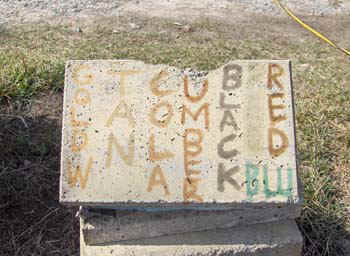
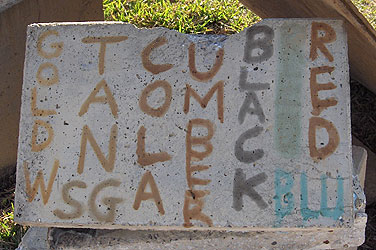
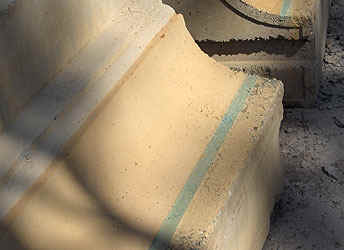
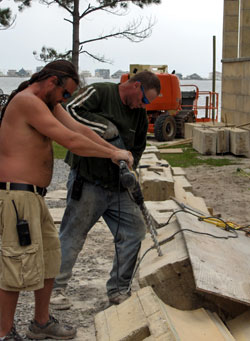
All Easter weekend Dave and I painted concrete acid stain on the double row of cornice blocks that Mike lined up for us. It is not helping that even tho it is sunny, it is doggone cold. Somehow we seem to have winter every year in March... poor Spring Breakers. It has gotten down in the 40's every night for the last few days and that means cold mornings and cold wind out out of the north as soon as the sun is off of you. We are not sure if the colors are going to 'take' like we want them to. Some of these cornice blocks seem to react with the concrete cornice blocks really well and others... not so much. And the colors change overnight after you apply it. And the colors look really different in the sun vs. the shade. I used the green for the first band along the lower part. Since the green test patch I did a long time ago on a piece of scrap is looking more and more Green, I am hoping that the Green will eventually develop into a noticeable Green. Then next comes a small stripe of Blue. It is showing up OK. After that, in the big sweeping curve is Tan. On some blocks it looks tan and others, ...not much. Then at the top , on a very narrow strip is a row of English Red. On the regular blocks that color turned a deep red. Here is is not showing much color even tho I have done several coats. I will wait until tomorrow to evaluate it and decide what to do. When the sun is on the cornice, the colors look more lively, but in the shade they are really hard to see. Because of the way the cornice is shaped and how it will be on the house, it will be in shade all the time. |
|
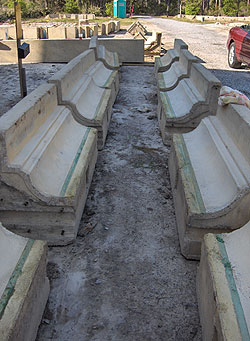
These have the Green and Blue. |
Green, Blue and Tan. |
It is CHILLY in the shade ! |
|
 |
|
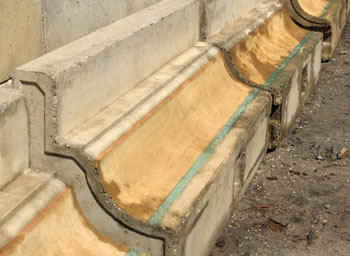
See how much better the Tan looks in sunshine. There is still acid stain residue on them. They have not had rain or been scrubbed off. |
|
 |
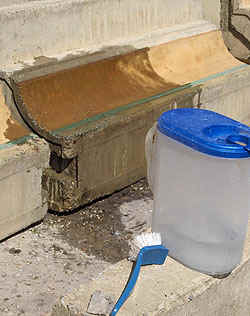
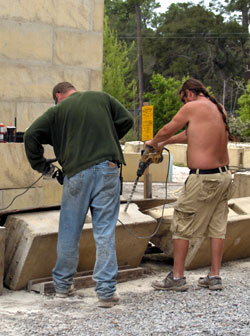
I found that those cheap foam brushes were best for applying this thin acid stain product to the curved surfaces. It is easier to avoid drips which would screw up the whole thing. I purposely applied the stain in order so if there was a drip or splash, hopefully the color under it would have already done its reacting and the drip would not be able to make the concrete sizzle and accept the color. The bottom of most of our cornice blocks have a lot of aggregate (rocks) showing and they will not react with the concrete acid stain and color-up. The wind was blowing so strong today that I had to hold on to the plastic container all the time for fear that a gust would blow it over and really make a permanent mess. |
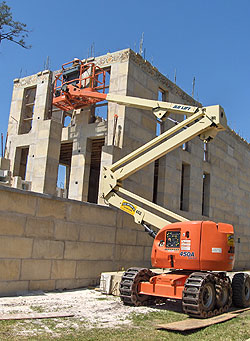
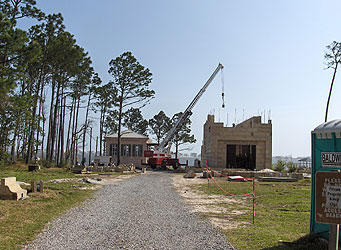
Over the weekend the guys made wood reinforcing braces for the tops of blocks that had been cut in prep for our big concrete back-fill pour. This morning early the concrete pumper truck was here and 18 yards of concrete was delivered. I was not here to take any photos. |
|
 |
|
All the last few rows to be stacked were back-filled with concrete this morning. The exception was the blocks right next to this doorway. They were blocked off since we noticed that the holes and electric boxes for the outdoor lighting on either side of the door had not been cut. If you are building make sure that you go over your place carefully looking to be sure that EVERY opening that you want and every electric box is in place before you back-fill. Sooooo... later today one of our workers was up in the man-lift using a hammer chisel to make openings for the electric boxes for the exterior lanterns. |
|
 |
 |
I am sure hoping that the color in the thin stripe painted with the English Red stain develops overnight. You can see from our text piece what the color should look like. And the green doesn't look too green here, plus when I was painting it on, I mistakenly thought it was 'red' and wrote that word before I realized that it was, in fact, green and so you can see the word 'red' faintly thru the color. |
|
Concrete Acid Stain Color Test Block in February |
Same Block a Month Later (Today) |
 |
 |
In Sun |
In Shade |
 |
|
Tuesday--Next day the guys set the huge beam early on, before I got to the house to take photos, it was in place. The upper part of the wall in the master bedroom sits on this beam. |
|
 |
 |
 |
 |
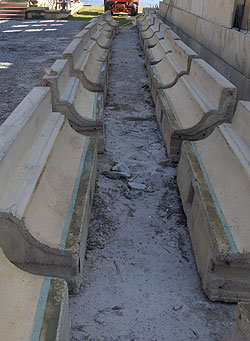
So for me, it was back to the acid stain color on the cornices. I scrubbed some of the residue off to see how the color looked. Seems that some properties of the concrete in the cornice blocks make the acid stain color behave differently from the blocks. The cornice blocks do not take the color as well...the color is there but much lighter. |
 |
This is how the cornice blocks looked with the acid stain residue on them. |
|
 |
I then took a hose with a blast type nozzle and a broom and washed off all the blocks. After they were dry, I went back over the red acid stain narrow band at the top. |
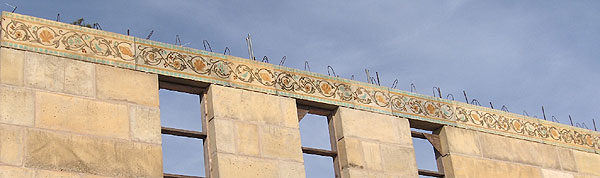
Here is how the cornices looked after they were all scrubbed of the acid stain residue. This is not all that we will need on the house, but it is a good start. |
 |
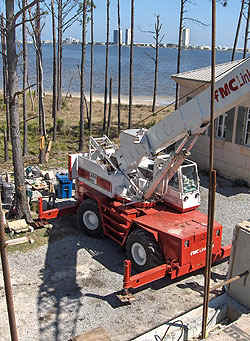 |
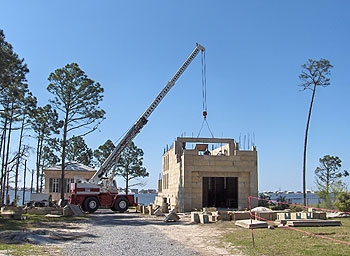
Couldn't resist taking a photo of our crane from up on the top floor. Just think, all those skinny trunks next door are mostly dead trees. The trees died from the salt that Hurricane Katrina put into the air. It is true that Hurricane Ivan was way worse on us here, but I suppose the trees may have already been in a bad mood when Katrina hit, but seems that there was a lot more salt put in the air. Also, this lot next door used to be solid green... no kidding. The underbrush was so dense that even Tarzan would have thought twice about venturing in. Now it is wide open, more breeze and sun, but way less privacy. Fortunately the underbrush is starting to grow again. |
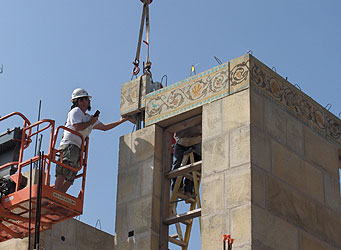
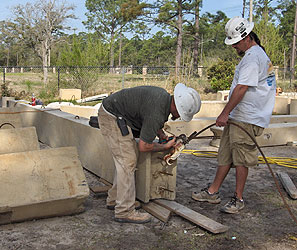
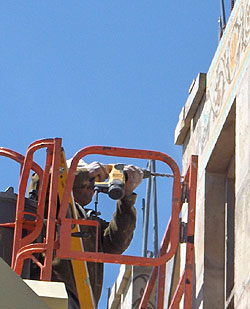
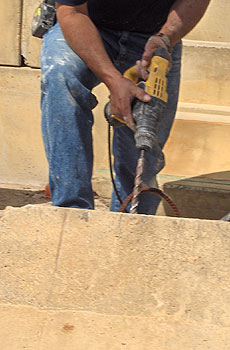
Don was measuring for the holes to be drilled into the cornices. These super blocks are so heavy and they sit on top of the smaller block walls. To insure strength, threaded rods go all the way up out of the center of the walls, thru the holes in the blocks and get nuts screwed down tightly. |
 |
Juan was doing most of the drilling, but my camera was out of battery and my photos didn't come out right. The drill is huge. This photo of Mike shows the drill they use to go all the way thru these huge blocks of concrete. I have older style cornice blocks, the new ones have more hollows. The back-fill can now go into the interiors of the cornice blocks for strength. 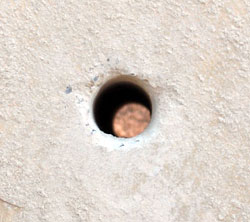 |
 |
 |
 |
So at the end of the day today, we had one cornice block set on our west wall. We also had a tree shadow on that wall when I took the photo. |
|
 |
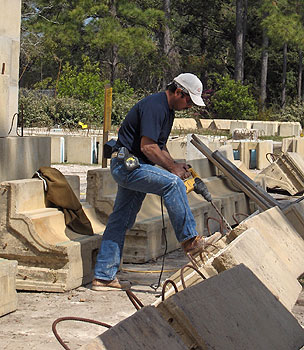 |
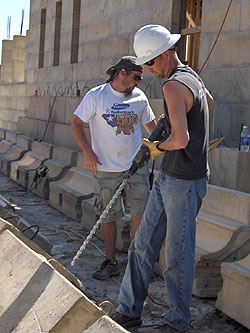
Here is Juan back on drilling today, Thursday. When I saw him around noon, the bit had hit a piece of rebar. Don was assisting with a different sized bit , trying to get thru the difficulty and a bit was stuck. They were using pliers to try to back it out of the hole. Mike is in Mississippi making plans for their next DAC-ART construction job and was going to come back thru Theodore, AL to see if our necessary blocks are being poured. |
|
 |
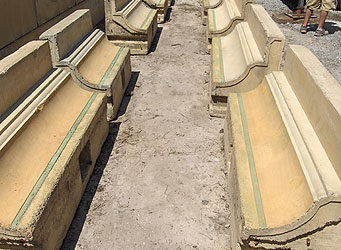
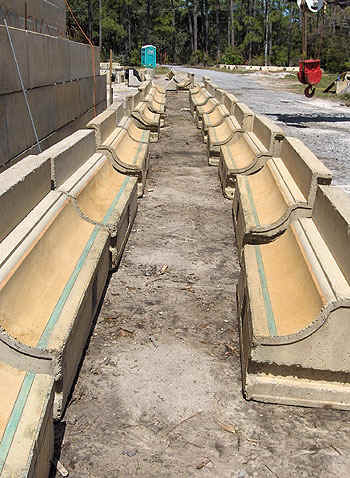
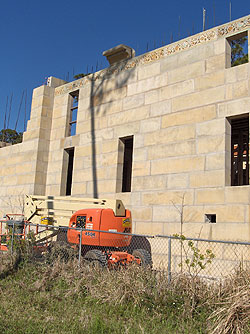
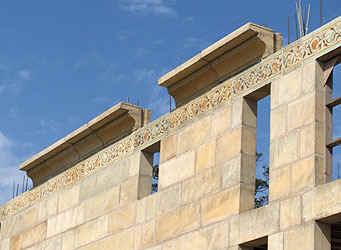
Saturday, March 29th, 2008 - Now with several pieces of cornice in place and shimmed, you can sorta see what the effect is going to be in scale with the height of the building. Still looks rather narrow, much more so than the acid stain frieze looks when you are painting the blocks on the ground. |
 |
|
Don and Ryan were drilling cornice blocks for the east side today. Later on, Don was in the man-lift while the crane was used to lift and place the cornice blocks. Men up in the room, helped thread them over the stainless steel rods and tighten down the nuts on top after the cornice was in place. It was a bit gloomy at first, then the sun came out and there was a nice breeze. |
 |
 |
 |
|
5 Minutes Video of setting a cornice block on the east side. |
 |
 |
 |
 |
|
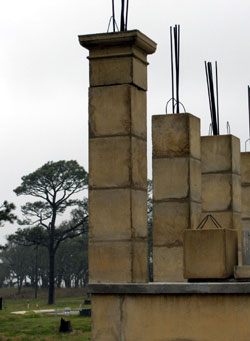 < <
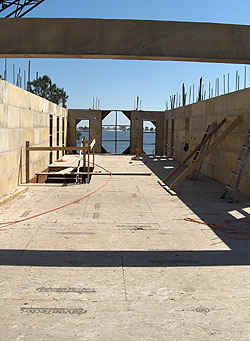
We only have one capital for our column blocks and are waiting on the rest before we can assemble the upper porch flooring supports. |

A new business journal is coming. It will cover Baldwin County and Mobile Bay area. May is the first issue. Should be interesting, with the big real estate shutdown around here and all the new big business coming to Mobile soon. Villa Lagoon Tile will advertise for sure ! |
Villa Lagoon Tile
Introducing Encaustic Cement Tile to the Coast. Known the world over as mosaicos hidráulicos. The ideal floor for a hurricane proof project, residential or commercial, with global availability. Explore the beauty of cement tile.
You can support this website by starting all Amazon purchases here, just click thru our link![]() , or search below.
, or search below.
 | Copyright 2005-2016 All Rights Reserved Fort Morgan Web Development, Inc. | |
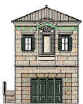
Original WebsiteVilla Lagoon Phase I completed in 2003 | New Website-2007-2009Phase II North Elevation w/ Frieze |